Use low gear and appropriate engine braking
Truck and bus drivers must both:
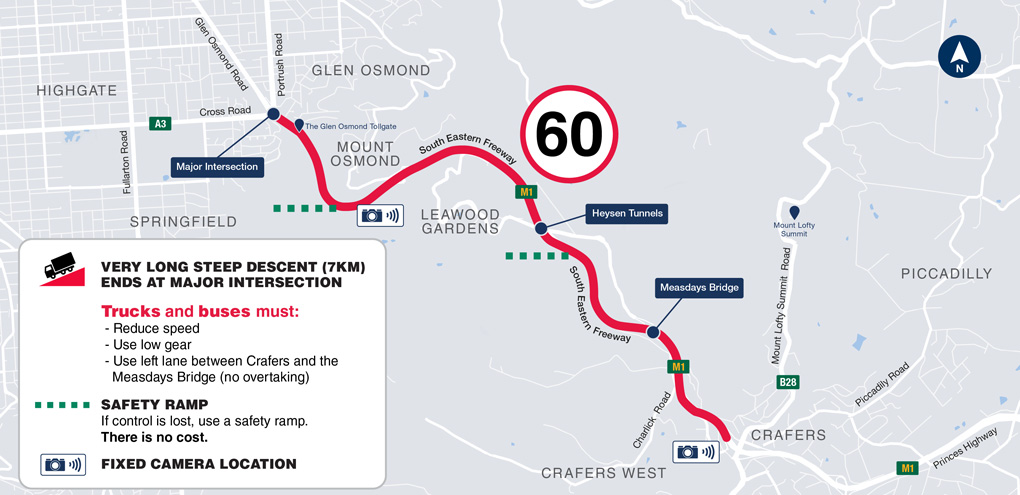
- use low gear and the appropriate engine brake before the Crafers Interchange
- remain in this gear to the bottom of the South Eastern Freeway.
When they control their speed this way, they should not need to use their primary or foot brake, except for briefly to change gears.
In automatic trucks, lock the low gear in or switch to manual.
The law requires truck and bus drivers to:
- use a gear that is low enough to enable the vehicle to be driven safely
- not rely on the primary brake as the only way to slow the speed of the vehicle on the descent.
Primary or foot brakes can easily overheat and lose their effectiveness. When this happens, drivers could lose control of their truck or bus.
However, the intent of the low gear offence is not to completely prohibit the use of the primary brake. Drivers should use the primary brake if it is necessary in the circumstances.
Reduce speed
Trucks and buses must slow down to no more than 60 km/h from Crafers interchange to the bottom of the South Eastern Freeway. If there are signs showing a lower speed limit, they should follow the lower limit.
60 km/h is the maximum speed a truck or bus can travel on the South Eastern Freeway down-track. The appropriate speed for specific vehicles may be lower, such as for a heavy-laden truck.
To maintain safe travel, speeds may be further reduced below 60 km/h at any time via:
- the variable speed limit signs
- other temporary speed limit signs.
A further reduced speed limit may be due to inclement weather, reduced visibility or an incident, such as a crash or roadworks.
Stay in the left lane
Trucks and buses must stay in the left lane between Crafers and the Measdays Bridge exit ramp. They cannot overtake between these points.
However, trucks and buses may overtake on the descent as long as they both:
- remain in low gear
- do not exceed 60 km/h.